
I’ve received countless emails asking me where you can find the best templates to make magazines and how to turn these templates into a digital publication with easy-to-use magazine maker software. Therefore, I created this blog post explaining how you can utilize my free online magazine templates to make magazines. To convert your final PDF magazine into a great digital publication, I found this cool free software called Yumpu Publishing.

Step 1 – Download one of my templates to make magazines
If you are not used to working with InDesign or Photoshop to create your own, professional magazine template, you’ll need to find one online. I prepared two free magazine templates in .PSD and .INDD format for you, which you can all download. The only thing you need to do afterward is to replace the blind text with your own content. Of course, you can also change colors and images.
Pick your favorite template:

Car Magazine TemplatePhotoshop Template
InDesign Template
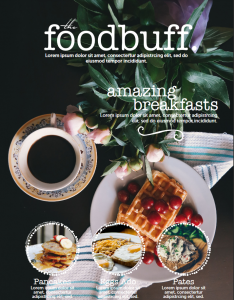
Food Magazine TemplatePhotoshop Template
InDesign Template
There are countless other places on the web where you can find an online magazine template. I have three sources, which I recommend you to try.
- 1. GraphicRiver
- 2. Creative Market
- 3. Canva
GraphicRiver and Creative Market both offer high-quality products but at a premium. The average magazine on either marketplace will set you back around $20. It’s also worth noting that the online magazine template files sold on GraphicRiver and Creative Market are usually in Adobe Photoshop or InDesign format and you will need a copy of the relevant application to edit the template file.
Canva, on the other hand, offers free online magazine templates, an online builder, with premium add-ons available should you require them. All you need to do is enter your name and email address and you’re in! Alternatively, you can log in via one of your social media accounts. Canva will let you in to play around immediately but they also send a verification email, so be sure to confirm your account. There are lots of free magazine templates available. Have a scroll through and choose your favorite template.
Step 2 – Publish your online magazine
Once you have finished designing your magazine you will need to export it as a PDF.
There are a number of free online magazine makers which you could use to publish your magazine, however, I would definitely advise trying Yumpu Publishing. It offers the most feature-packed, FREE plan of all the publishing solutions. If you’re interested, you can find more information on digital magazine publishing software in my article “Quick Guide: Digital Magazine Publishing Software”.
So let’s navigate to yumpu.com in our browser.
To create an account all we need to do is upload our file via the drag and drop uploader on the main page.
Once our file is uploaded we will be prompted to enter our username and email address or create an account via a social media account such as Twitter.
Yumpu will then send you a confirmation email, you will need to follow the link in this email in order to activate your account.
Once your account is activated you will be prompted to fill out some profile information, after which you can begin to edit your uploaded magazine.
To edit your magazine, hover your cursor over your username, which is located in the top menu. This will display a drop-down menu. From the drop-down menu select “My Magazines”.
Here you will be able to view all the files you have uploaded and any collections you have made with those files.
Let’s have a look at some of the editing options available for our magazine by clicking the “Edit Magazine” button located under “Tasks”.
Here we can amend the title of our magazine, edit the description, add tags and even change the language.
We can also embed the magazine in a variety of places around the web, including our website or blog as shown below.
Should you want to add links, audio, or video to your online magazine you can do so from this section. Simply click the “Add page element to your magazine” button in the “Add multimedia to your magazine” section.
The Yumpu editor is fairly straightforward. Select your multimedia element on the left, draw a content box and fill in the details (i.e. YouTube video URL or link address) in the panel on the right, and click save. Once you have finished adding multimedia content you can return to the “Edit Magazine” area.
Step 3 – Share your content with Yumpu Publishing
All that’s left to do now is read through your finished product and share it with your friends, family, and colleagues.
To read your magazine, click “View magazine” which is located under the preview box in the “Edit Magazines” area.
In the “View Magazine” area you will see the “Share” button, click this to reveal all the social media sharing options available to you.
Hopefully, this guide has answered all the questions you guys sent in. If you have any questions or feedback please do leave a comment below.
Leave a Reply